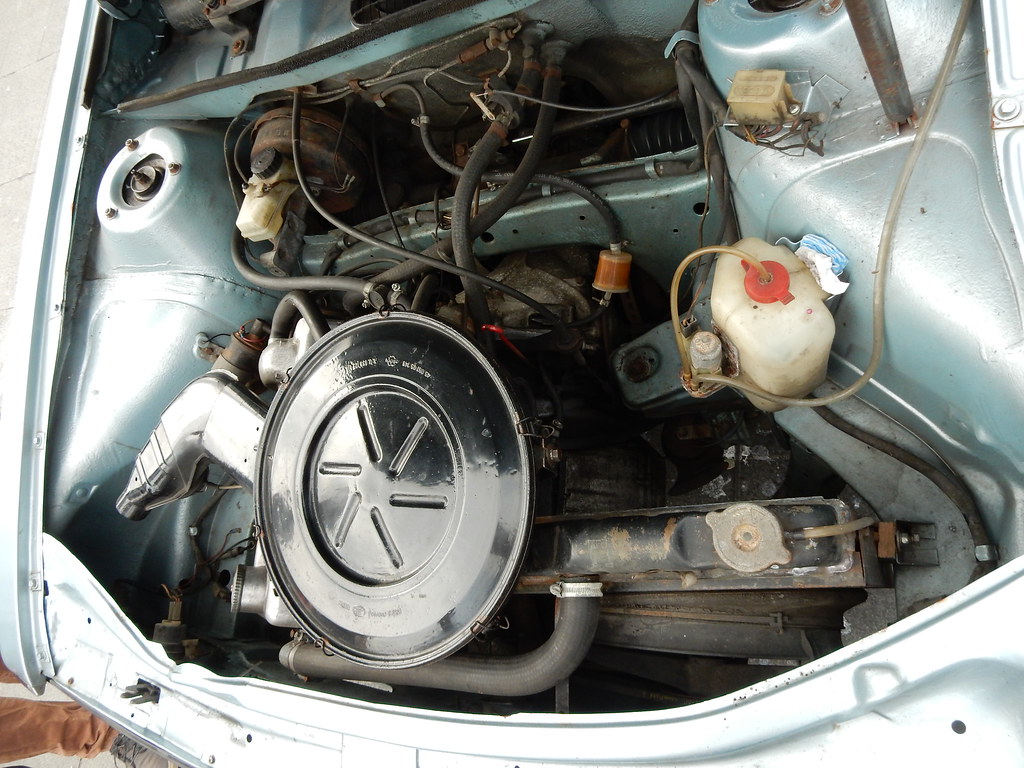
Who this is for: This guide is for car owners looking to save money on maintenance and gain confidence in understanding their vehicle. You’ll learn practical tips to perform basic car care yourself, prevent costly repairs, and choose when to call a professional.
TL;DR: Performing simple DIY car maintenance like checking tire pressure, fluid levels, and replacing filters can save hundreds or thousands in labor costs and prevent major breakdowns. Start with easy tasks, prioritize safety, consult your owner’s manual, and know when to seek professional help for complex or safety-critical issues.
Few things are as unsettling as a check engine light or a strange new car noise. It’s not just the inconvenience; it’s the instant mental calculation of what that repair bill is going to cost. For years, many people hand over their keys and their wallet, trusting mechanics. And good mechanics are worth their weight in gold for serious issues. However, a significant amount of basic maintenance can be done by car owners themselves with a little bit of learning and effort. This guide explores DIY car maintenance tips to keep more money in your pocket.
A little preventative care goes a long way. Skipping simple tasks like oil changes or fluid checks doesn’t just make a car run worse; it turns small issues into massive, expensive problems down the road. By tackling these basic tasks, you’re not just saving on labor costs (which can be $100+ an hour!), you’re also catching potential problems early, before they become catastrophic. Learning to do some of this yourself is one of the smartest financial moves a vehicle owner can make.
The Low-Hanging Fruit: Simple Checks Anyone Can Do
Start with the absolute easiest tasks. You don’t need special tools or even a deep understanding of how an engine works for these. These are critical for both safety and preventing bigger issues. Making these a habit can genuinely save hundreds, if not thousands, over the life of a car.
Tire Pressure: Your Wallet and Safety Depend On It
This is probably the simplest and most overlooked bit of car maintenance. Improperly inflated tires wear out faster, reduce gas mileage, and can even be dangerous. Under-inflated tires create more rolling resistance, meaning the engine has to work harder, burning more fuel. Over-inflated tires lead to uneven wear and less grip on the road. Checking tire pressure at least once a month, and always before a long road trip, is a good practice.
- How to do it: You’ll need a tire pressure gauge (typically around $5 at any auto store). Your car’s recommended tire pressure (PSI) is usually on a sticker inside the driver’s side door jamb or in your owner’s manual. Unscrew the cap from the tire’s valve stem, press the gauge firmly onto the stem, and read the number. If it’s low, add air (most gas stations have free air pumps, or you can get a small portable compressor). If it’s too high, gently press the pin in the center of the valve stem to release air.
- Key takeaway: This is a no-brainer. It takes five minutes and directly impacts fuel economy and tire life. Gas mileage can drop noticeably when tires are a few PSI under, and it adds up fast.
Fluid Levels: The Lifeblood of Your Car
Your car has several vital fluids that need to be at the correct levels to function properly. Checking these is usually pretty straightforward and can prevent costly damage to major components. It’s a good practice to check all fluids every few months, or before a long drive.
Here are the main ones:
- Engine Oil: The most crucial. With the engine warm and off (and the car on a level surface), pull out the dipstick, wipe it clean, reinsert it fully, then pull it out again to check the level. It should be between the ‘min’ and ‘max’ marks. If it’s low, add the correct type of oil (check your owner’s manual).
- Coolant/Antifreeze: This keeps your engine from overheating. Look for the translucent reservoir under the hood. The level should be between the ‘cold fill’ and ‘hot fill’ lines. NEVER open the radiator cap when the engine is hot – serious burns can result. If it’s low, add a 50/50 mix of coolant and distilled water.
- Brake Fluid: This is in a small reservoir, usually near the master cylinder (often on the driver’s side of the engine bay). The level should be between the ‘min’ and ‘max’ lines. If it’s consistently low, it could indicate worn brake pads or a leak, which needs professional attention ASAP. Don’t just top it off without investigating.
- Power Steering Fluid: For older cars with hydraulic power steering. There’s usually a small reservoir with a dipstick or ‘min/max’ lines. If it’s low, steering might feel stiff.
- Windshield Washer Fluid: Easy one! Just top it off when it’s low. Use proper washer fluid, not just water, especially in freezing temperatures.
Stepping Up Your Game: Maintenance Tasks for the Slightly More Ambitious
Once you’re comfortable with the basic checks, you can move on to tasks that require a few more tools but offer even bigger savings. These are the kinds of services garages charge a decent chunk for, and you can absolutely learn to do them yourself. Many start with oil changes, and it’s often not as messy or intimidating as it sounds.
Oil Changes: The King of DIY Savings
Changing your own oil and filter is probably the most common DIY car maintenance task, and for good reason. It’s relatively simple, saves a lot of money (often $30-$50 per change), and is fundamental to your engine’s longevity. Aim to do this every 5,000 to 7,500 miles, depending on the oil type and driving habits, but always consult your owner’s manual.
- What you’ll need: New oil (correct type and quantity), a new oil filter, an oil filter wrench, a wrench for the drain plug, a drain pan, a funnel, and some rags. You’ll also want jack stands and a jack if your car needs to be raised for access (NEVER work under a car supported only by a jack!).
- The basic steps: Warm up the engine for a few minutes. Safely lift and support the car if needed. Place the drain pan under the oil pan. Remove the drain plug and let the old oil drain completely. Replace the drain plug. Move the pan under the oil filter, remove the old filter with the wrench, and let any remaining oil drain. Lightly coat the rubber gasket of the new filter with fresh oil, then screw it on hand-tight (plus about a quarter turn). Lower the car. Add the new oil through the fill cap, checking the dipstick periodically. Start the engine, let it run for a minute, then shut it off and recheck the oil level. Dispose of the old oil properly (most auto parts stores will take it for free).
- Key takeaway: The first time an oil change is performed, it might take a full hour. With practice, it can be done in about 20 minutes. The biggest headache is often getting the old filter off! But the savings are real, and you know exactly what kind of oil is going into the engine.
Tire Rotations: Extending Tire Life and Performance
Rotating your tires ensures they wear evenly, extending their lifespan and improving handling. Different tires on your car wear differently; front tires often take more abuse from steering and braking. Most manufacturers recommend rotating tires every 5,000 to 7,500 miles, often coinciding with an oil change.
- What you’ll need: A jack, jack stands, a lug wrench, and ideally a torque wrench.
- The basic steps: Consult your owner’s manual for the correct rotation pattern for your vehicle (there are usually different patterns for front-wheel drive, rear-wheel drive, and all-wheel drive). Loosen the lug nuts slightly while the car is on the ground. Safely lift and support the car on jack stands. Remove the wheels. Move them according to the pattern. Reinstall the wheels, hand-tighten the lug nuts, then lower the car. Finally, use the torque wrench to tighten the lug nuts to the manufacturer’s specified torque setting (this is important to prevent over or under-tightening).
- Key takeaway: This one is a bit more involved than an oil change because it involves lifting the whole car. If you’re not comfortable with jacks and stands, it might be worth paying a shop. However, if you’re already lifting the car for an oil change, adding a rotation isn’t much more work. Savings can be around $20-$40 per rotation.
Air Filter Replacement: Breathing Easy and Saving Gas
Your engine air filter keeps dirt and debris from getting into your engine, and a clean filter helps your engine run more efficiently. A clogged filter restricts airflow, leading to reduced fuel economy and horsepower. Cabin air filters, on the other hand, keep the air inside your car clean. Both are usually very easy to replace.
- Engine Air Filter: Typically located in a plastic box on top or to the side of your engine. Usually, you just unclip a few latches or unscrew a couple of screws, pull out the old filter, drop in the new one, and close it up. Check it every 10,000-15,000 miles, or more often if you drive on dusty roads.
- Cabin Air Filter: Often behind the glove compartment or under the dashboard. Accessing it might involve removing a few screws or clips from the glove box. These can get really dirty, especially if you have allergies! Replace every 15,000-20,000 miles or annually.
- Key takeaway: These are probably the easiest money-saving DIYs. Filters are cheap, usually under $20, and shops charge $50-$100 for the part and labor. Cabin filters can become very dirty, making a huge difference in air quality when replaced.
When to Call a Pro: Knowing Your Limits
While DIY is encouraged, there are definitely times when it’s smart to call in a professional. Ignoring these limits can lead to more expensive repairs, or worse, compromise safety. Some learn this the hard way with a tricky brake job that ends up costing more in specialized tools and frustration than if it had just been taken to the shop initially.
Here are some scenarios where a professional is usually the best bet:
- Brake System Beyond Pads: While changing brake pads and rotors can be a DIY project for some, anything involving brake lines, master cylinders, or ABS systems should be left to certified mechanics. Your brakes are your primary safety system.
- Transmission Issues: Transmissions are complex and expensive. If you’re experiencing shifting problems, strange noises, or fluid leaks from the transmission, it’s a job for a specialist.
- Check Engine Light Diagnostics: While you can buy an OBD-II scanner (around $30-$100) to read basic trouble codes, interpreting those codes and diagnosing the root cause often requires expertise and specialized diagnostic tools. A code might point to a sensor, but the sensor might be failing due to an underlying issue.
- Suspension and Steering Components: Ball joints, control arms, tie rods – these are critical for safe handling and can be dangerous to replace without the right tools and knowledge.
- Timing Belt/Chain Replacement: This is a major job that, if done incorrectly, can lead to catastrophic engine failure. It’s usually a long, labor-intensive process.
- Anything Involving Airbags or Advanced Safety Systems: These systems are incredibly sensitive and can be dangerous to tamper with.
A good rule of thumb is: if it involves critical safety systems (brakes, steering, airbags) or requires highly specialized tools and deep diagnostic knowledge, head to a shop. For everything else, research and try to tackle it yourself. It’s about balancing savings with safety and realistic expectations of your own skill level. Knowing a good, trustworthy mechanic is invaluable. For tips on reducing other household expenses, consider how you can often negotiate bills with service providers.
Essential Tools for the DIY Car Enthusiast
You don’t need a full-blown mechanic’s garage to get started, but a few basic tools will make your DIY car maintenance much easier and safer. Many build up their collection over the years, often buying a tool only when specifically needed for a task.
Must-Have Basic Tools:
- Socket Set: Metric and standard. This is probably the most used tool set for anything under the hood or chassis.
- Wrench Set: Again, metric and standard.
- Screwdriver Set: Phillips and flathead, various sizes.
- Pliers: Needle-nose, slip-joint, and locking pliers (vise-grips).
- Tire Pressure Gauge: A digital one is often easier to read.
- Work Gloves: Protect your hands from grease and sharp edges.
- Safety Glasses: Always protect your eyes!
- Rags/Shop Towels: You’ll need a lot of these for spills and wiping.
- Drain Pan: For collecting old oil and other fluids.
- Funnel: For adding new fluids without making a mess.
- Jack and Jack Stands: Absolutely essential for safely lifting your car. Never, ever use concrete blocks or just the jack alone.
Good-to-Have Specialty Tools (for specific tasks):
- Oil Filter Wrench: Many types exist; find one that fits your filter.
- Torque Wrench: Crucial for tightening lug nuts and other critical fasteners to the correct specification.
- OBD-II Scanner: For reading check engine light codes.
- Battery Terminal Brush: For cleaning corrosion off battery terminals.
- Multimeter: For basic electrical troubleshooting.
Start with the basics, and add tools as you take on more complex projects. Good tools last a lifetime and pay for themselves quickly in saved labor costs.
Understanding Your Owner’s Manual: Your Best Friend
Your car’s owner’s manual is an invaluable resource that too many people ignore. Keep it in the glove box and refer to it constantly. It contains specific information about your vehicle that you won’t find on a general DIY blog (even this one!).
What You’ll Find Inside:
- Maintenance Schedule: The factory-recommended intervals for oil changes, fluid flushes, filter replacements, timing belt changes, etc. Follow this religiously.
- Fluid Specifications: The exact type, weight, and quantity of engine oil, transmission fluid, coolant, and brake fluid your car requires. Using the wrong fluid can cause serious damage.
- Tire Pressure and Rotation Patterns: Specific PSI for your tires and the correct way to rotate them for even wear.
- Bulb Types: What kind of bulbs your headlights, taillights, and interior lights use.
- Fuse Box Diagrams: Where your fuses are located and what each one controls.
- Warning Light Explanations: What all those dashboard lights mean.
- Torque Specifications: How tight various bolts should be, particularly important for lug nuts.
Treat your owner’s manual like a repair Bible. It’s designed to give you all the precise information you need to keep your specific make and model running smoothly.
Saving on Parts: Don’t Always Go for the Cheapest
When doing DIY car maintenance, you’ll inevitably need to buy parts. It’s tempting to always go for the cheapest option, but that’s not always the smartest move, especially for critical components.
Here’s an approach to buying parts:
- OEM (Original Equipment Manufacturer) Parts: These are the exact parts your car was built with. They’re usually the most expensive but guarantee perfect fit and performance. Consider using these for critical components like sensors, brake parts (sometimes), or anything that’s a pain to replace if it fails prematurely.
- Aftermarket Parts (Reputable Brands): Many reputable companies make high-quality parts that meet or exceed OEM specifications, often at a lower price. Brands like Bosch, ACDelco, Denso, Moog, and Gates are generally trustworthy. This is often a good choice for things like oil filters, air filters, spark plugs, and most wear-and-tear items.
- Cheap Generic/No-Name Parts: Avoid these for anything critical. While a cheap wiper blade might be fine, a cheap brake pad or fuel pump is asking for trouble. For something simple like a hose clamp, they might be okay, but for anything that impacts safety or engine function, it’s a hard pass.
Consider buying parts from major auto parts chains (AutoZone, Advance Auto Parts, O’Reilly) or reliable online retailers. They often have sales and loyalty programs, and their staff can sometimes help confirm you’re getting the right part for your specific year, make, and model. Don’t be afraid to ask for their help!
Record Keeping: Your Maintenance Journal
One of the best habits to develop is keeping a simple log of all your car’s maintenance. Whether it’s a DIY oil change or a professional repair, jot down the date, mileage, what was done, and any parts used.
Why Keep Records:
- Stay on Schedule: Helps remember when the next oil change or tire rotation is due.
- Troubleshooting: If a problem arises, you can look back and see if any recent maintenance could be related.
- Resale Value: A well-documented service history can significantly increase your car’s resale value. It shows prospective buyers you’ve taken good care of it.
- Warranty Claims: If you ever have a warranty issue, proof of regular maintenance is often required.
A simple spreadsheet on a computer, or a small notebook in the glove box, works just as well. The key is consistency.
Frequently Asked Questions
Is DIY car maintenance really safe for beginners?
Yes, absolutely, as long as you start with simple tasks and prioritize safety. Always use jack stands when working under a lifted car, wear safety glasses, and never rush. Your owner’s manual and online tutorials are great resources. Know your limits – don’t attempt complex repairs you’re not comfortable with.
How much money can I actually save with DIY car maintenance?
The savings can be substantial. For routine services like oil changes, air filter replacements, and tire rotations, you’re primarily saving on labor costs, which can easily be $50-$150 per service. Over a few years, these savings add up to hundreds, if not thousands, of dollars. Plus, by catching small issues early, you prevent larger, more expensive breakdowns.
What are the most common DIY car maintenance mistakes?
Common mistakes include not using jack stands, over-tightening or under-tightening bolts (especially drain plugs and lug nuts), using the wrong type of fluid, and not properly disposing of used fluids. Always double-check your work, and if something feels wrong, stop and re-evaluate.
Where can I learn more about specific DIY car repairs?
Your car’s owner’s manual is the best starting point. Beyond that, YouTube is an incredible resource for visual step-by-step guides for almost any make and model. Forums specific to your car’s brand or model can also provide valuable insights and troubleshooting tips from other owners.
How often should I check my car’s fluids and tire pressure?
It is recommended to check tire pressure monthly and before any long trip. Fluid levels (oil, coolant, brake fluid) should be checked every few months or about every 3,000-5,000 miles. Your owner’s manual will have the precise recommended schedule for your specific vehicle.
Do I need special insurance for DIY car work?
No, you typically don’t need special insurance for performing your own maintenance. Your standard car insurance covers your vehicle for accidents and damage as usual. However, it’s wise to ensure your homeowner’s insurance (or renter’s insurance) covers any liability if someone were to get injured on your property while helping you, or if damage occurred to your property during the work. Always prioritize safety to prevent accidents.
Taking care of your car doesn’t have to break the bank. By implementing these DIY car maintenance tips, you can take control of your vehicle’s health, save significant money on repair bills, and gain a satisfying sense of accomplishment. Start small, be safe, and you’ll be amazed at what you can do!
Leave a Reply